BYOC Pedal Kits
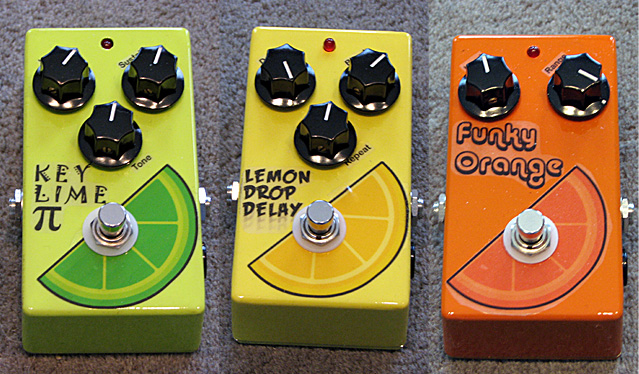
Build Your Own Clone sells great kits for buiding your own pedals. I decided to give them a shot and was adventurous, so I bought three of the kits: The Large Beaver (Big Muff clone), Envelope Filter (DOD 440) and the Digital Delay (not necessarily a clone of any particular pedal).
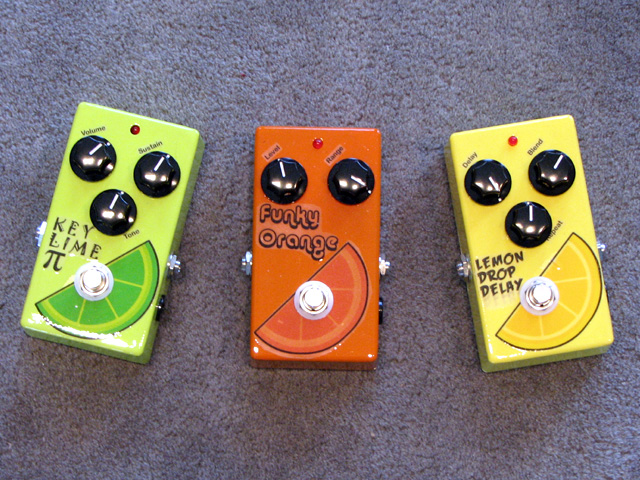
Painting: I was nervous about finishing the enclosures, but I was impatient as well. A bad combination. I went with the Beavis Box Finish in a Day method. I went to the Home Depot, picked out my favorites of the Rustoleum colors they had on hand, got primer and clear coat. Since they didn’t have self-etching primer, I got a container of etch too. They sell a quart size that was less than $5 as I recall. I followed the directions for the etch, primed and painted. I used the toaster oven trick (use an old one – never to again to be used for food!!) and baked each coat. I found that I needed to keep the parts in the oven longer than Bevis recommends. It might have been due to the cold temps on the days I did it.
Labels: To save time I went with what I had in the house. I used clear stick on labels that can be printed on with any InkJet. I created a layout in Photoshop and came up with some names. Truth is that I was trying to think up names all along, but couldn’t come up with anything clever. When the painting was done I realized the green for the Large Beaver pedal could be used to play on the “Pi” variant of the Big Muff pedals, so I came up with “Key Lime Pi”. The other two weren’t so clever, but I decide to keep them all in the citrus family. For whatever reason. Oh, right, the labels…I printed the labels and cut them out as close as I dared, then stuck them on the pedals. I put two thin clear coats the pedals and let them dry without heat. I was afraid the labels would curl right up and I’d have to start over again. I did a couple of more clear coats with heat and they were fine. I sanded and clear coated two or three times to try to minimize the edge of the labels. I think it would take about two more rounds of sanding and clear coating to get the tops to be perfectly smooth. I thought they looked pretty good as-is.
Two things to watch for with these labels: First, keep them away from the edge. It’s hard to get the clear coat smooth if the label is right on the edge. Second, keep the stickers away from any place that you’ll be putting a washer or nut. If you look closely at the Lemon Drop Delay, you’ll see that there is a little bit of a bubble. When I tighened the nut for the footswitch the clear coat cracked a little (I suspect the sticker must have compressed a tiny bit) and the next day the bubble appeared.
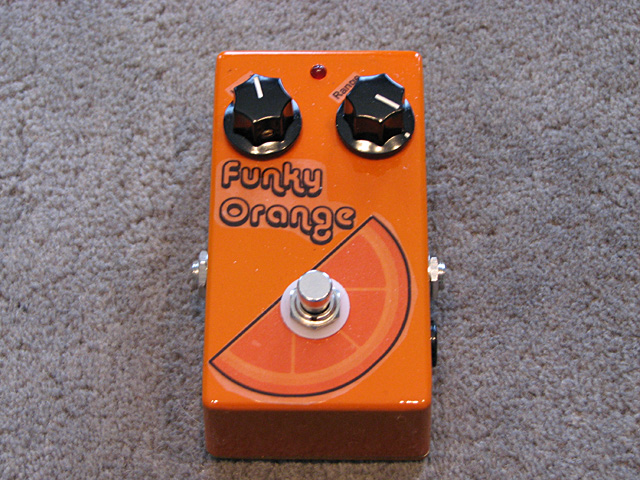
Oh, and you’ll notice the sticker edges show up the worst on the orange pedal. I think that’s because it’s darker and the sticker definitely lightens the color a bit. That was also the first pedal I put the stickers on, so I didn’t have the technique down yet ![]()
Key Lime Pi – Large Beaver fuzz
This is a fairly typical fuzz pedal from what I can tell. I’m not much of a fuzz user, but there are some fun sounds in here. The tone control has a nice range. The Sustain control gives it all the long, creamy sounding buzz you need. More than I ever need at least.
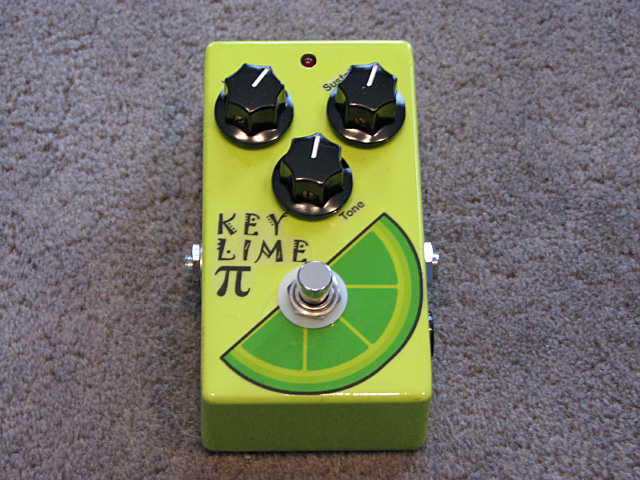
Sorry! No samples of the Key Lime Pi yet. It’s pretty typical Big Muff sound though. I had a problem with the original volume pot and had to replace it with a different one. A bit of a pain, but it worked out fine.
Lemon Drop Delay
This is a digital delay that is patterned after the older analog delay pedals. I used an Ibanez AD9 for many years and that is one of my favorties. It would be nice to have it here to compare. I think this pedal has a “digital sound” to it, but it sounds pretty good. Definitely usable, that’s for sure. I couldn’t quite get it to do the Pink Floyd “Run Like Hell” thing, but that’s probably asking a lot. Maybe I’ll try again when I’m playing better. I love the self oscillation silliness that it can get into. That was always one of my favorite things about the AD9.
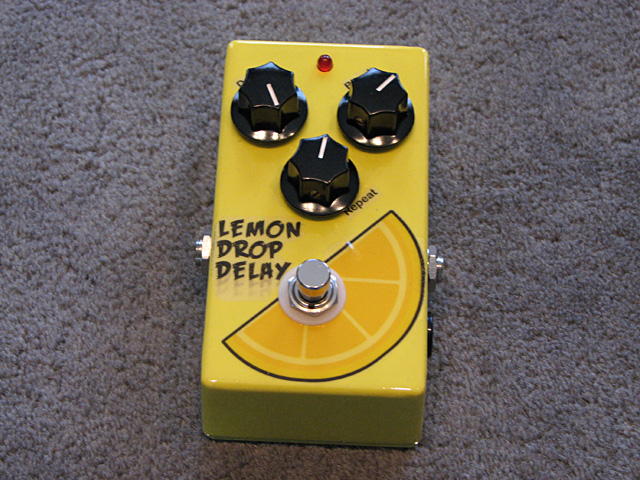
Give the Lemon Drop a listen: Lemon Drop Sample 1 – Changing Delay time
Lemon Drop Sample 2 – Slap Back
Lemon Drop Sample 3 – Harmonizing (sound on sound)
Lemon Drop Sample 4 – Self Oscillation
The Lemon Drop gave up the ghost after a few weeks of playing with it. I was 99% sure it was the delay chip that went bad (don’t ask me why I thought that). I ordered 5 more of the chips for $5 off of ebay, and so far so good.
Funky Orange – Envelope Filter
I didn’t really know what to expect with this pedal. At first I wasn’t sure it was working properly. It’s controls are pretty interactive (changing one affects the other considerably) and it’s quite sensitive to the guitar settings and the pick attack. I found on my guitar that the bridge-middle pickup combination seemed to make the filter effect more pronounced. I’m really liking this pedal right now. Fun to play with.
Funky Orange Sample 1 – Sly Riff, no effect then with effect
Funky Orange Sample 2 – Slow Chords
Funky Orange Sample 3 – Faster chords
Funky Orange Sample 4 – With distortion
For reference sounds (straight guitar, same guitar, same amp, no effects) see the Walnut Strat page.
Building: – The BYOC kits arrive in a plastic bag packed in a box. All the parts are there and not much else. The instructions for each pedal are on their website. Luckily, the instructions are really straight-forward. Just as backgound, I have some experience building homebrew pedals, but I’m really not all that good at it. I’ve done a couple from Craig Anderton’s book, and I’ve done a number of things like A/B switches. Simple things. Things that don’t require too much close-quarter soldering. I’ve replaced plenty of electronics on my guitars, but that’s a different sort of soldering.
I just tried to be as careful and methodical as possible. I verified that all the parts were there, laid them out, double and triple checked before I placed a component on the PCB. Checked all the solder joints before I moved on to the next. I started with what I thought would be the easiest kit (based on the density of the PCB), and saved the hardest (Digital Delay) for last. All three kits were nearly identical to put together except for the number and type of components. The boards are very clear and well laid out. A few parts on the Digital Delay made me nervous because of how close they are, but it all worked out.
I only came across a couple of little things. First, when it came time to connect the populated PCB to the hardware I had mounted in the enclosure, I wasn’t sure if I should put the wires in from the top or from the bottom. I ended up trying different ways from each pedal.
For the Envelope Filter I soldered all of the wires to the parts in the enclosure and then looped the wires from the pots over the top of the PCB. It worked fine, although there seems to be a fine balance between trying to keep the wires short and having enough to maneuver the PCB around. Here’s the inside of the Envelope Filter:
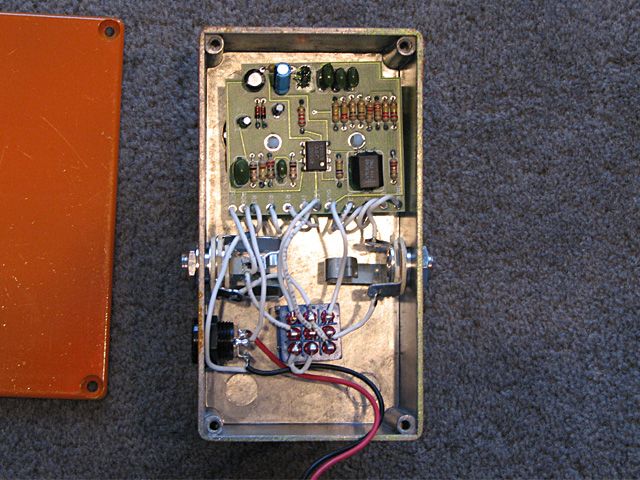
Notice how the white wires go down into the PCB.
For the Large Beaver, I did the opposite. I connected all the wires to the PCB, then connected them to the pots, switch and jacks. Although I think this might allow for shorter wires (if done properly by someone other than myself), I didn’t like this method for two reasons: First, you have to move the PCB around a lot in order to get the wires in position to solder them. I was always worried a wire or a solder joint would break. Neither happened, luckily. The second problem is that once I had everything done I had a much harder time positioning the PCB in the case. I didn’t get any of the three pedals perfect, but this one is the most off. Here’s a pic of the inside of the Envelope Filter:
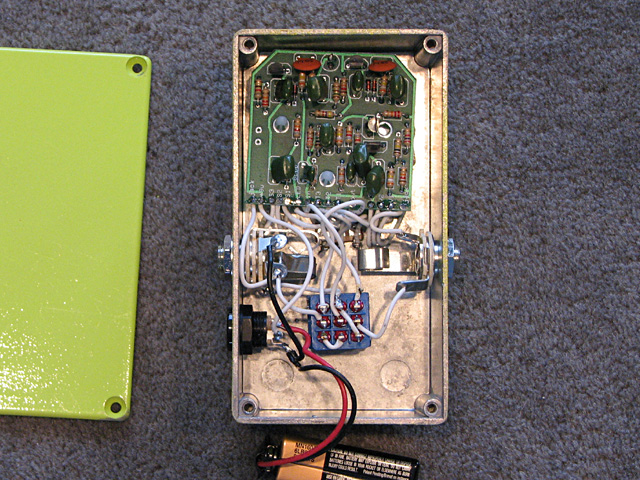
It’s a little hard to see, but the wires are inserted in the PCB from underneath.
On the Digital Delay I did a mix. I decided to install the wires from the top of the PCB, but I did a mix. I soldered the wires to the pots first, and did others however seemed comfortable. I had a little trouble with the footswitch. It’s awfully tight in there. I think I was lucky with the first two, but the third took several tries to get the wires in there relatively cleanly. Here’s the inside of the Digital Delay:
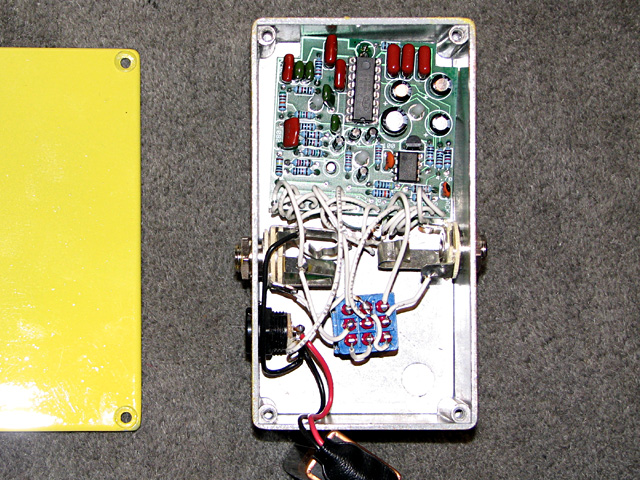
The PCB is cockeyed, but it works!
Results: All three pedals worked right after completion, but the Large Beaver had an intermittent problem with the volume control. I poked around and eventually narrowed down the problem – a bad volume pot. Once I replaced that everything was fine. The other two pedals seem to be functioning 100% – listen to the samples. All-in-all, great kits and I’m hoping I get the chance to put together a few more before too long.
Tags: BYOC, Effects, Guitar, Home Made, Pedal, Project