Sometimes…
A request I recently received via email – and I quote:
We are working on a project that would basically be a Flash interactive application. I attached a PDF that explains the function. Keep in mind this is not the actual design but more of a functional representation…
Would you be able to give me a cost as to how much you would charge for a project as such? I really need the pricing early tomorrow….
Attached was a one screen pdf with five or six comments about video, slides, transcripts and pause/play functions. Pretty basic as for “interactive” (in quotes because that’s practically *not* interactive at all) presentations. No sense of size, or whether there are any elements besides just the video and slides.
So I responded with a fairly detailed email asking specific questions, and about 30% of the questions were answered usefully. A short back and forth followed, which didn’t really help me clarify the project all that much. Not all that unusual for us freelancers – and really not so unusual in any working environment. Anyone who is on the building or project management end of a project knows that often the most difficult part is guiding the client through the process of actually defining the project clearly enough so construction can start. But this was just an estimate, so I put together one with a fairly wide range and tried to explain the various options, and I listed my assumptions, etc. I do that for any project I estimate, even if the goal is very clear.
What floored me wasn’t that request. It was the one I got from the same client within hours of the back and forth on the first request.
And I quote:
Can the xxxxx site be leverage as?…client wants us to do digital presentation:
Is there any way we can leverage our website code into a digital presentation??
if you can…please put pricing together…
I couldn’t believe I got that request immediately after going back and forth about how I needed at least some rudimentary info if I’m going to put together an estimate that is at all useful. So I responded:
No problem, but I need a better idea of what you’d like to do with it.
And I got back:
More detail is as follows…it would be taking the theme of the site and focusing on the gallery…adding projects that we’ve worked on/capabilities.
How many in the gallery..? ….I don’t have a number yet…but you may want to say x # of items in the gallery $$….
I admit it was silly of me to not be more specific in my response so that they were forced to confirm/deny/clarify whatever it is they are looking for. I had a feeling that this was a 100% exploratory type of thing, and I suspected it would never really turn into a paying project. So I told them that if they wanted to dump the site on a disk or something like that, no problem. It’s a simple site with no back end at all. If they want to expand their gallery section, we can do that, but I need an idea of what they want to do. Right now it’s just thumbnails that don’t link to anything and don’t have any additional info. No biggie if they want to just add thumbnails, but I couldn’t see where that would be very useful. If they want something more in depth, that’s certainly possible, but I need an idea of what they would like before I can estimate it.
I never heard back. Of course I’m not going to do an estimate, because I can’t. Ugh. These are good people, I’m sure. This is a new client for me, so I don’t know them very well. They seem nice. Seems maybe they’re stressed, but that’s common. I’m sure they’re smart. So when then are requests like this such a regular occurrence? I really don’t know.
Play off of all the Jersey Shore nonsense and build it up. Show “every day” people taking on the look and behavior of the guido world and see what happens. Probably a really bad idea.
Build a large music box type of machine – maybe a 55 gallon drum with spikes of some sort that is turned via a geared crank mechanism. Large tines made out of metal strips would produce tones as the spikes hit them.
The trick is to make it so the music can be changed as needed. The drum would have holes drilled all over it, and the spikes can be plugged into any of the holes. That way moving the spikes results in a different piece of music being played as the drum is turned.
Issues: spacing the holes so that even notes (8th and 16th notes) and odd groupings (at least triplets) can be played.
A large clock that shows time by two or three large, overlapping color wheels. Each wheel is some sort of gradient with a line showing the start and end of each gradient. Those lines are the hour, minute and second hands. The wheels are at least somewhat transparent so the colors are constantly changing.
I think it would be easy to build since clock parts are easy to get. A strong enough motor would be required, and the material for the wheels has to be light weight.
A guy in his city apartment watches the Nature channel all the time. Video shows his day from commute in, to commute home. Very gray and down, sort of a “Brazil” look. As in Brazil, row after row of gray workers. Weekends he goes to the park and is a little brighter, imagining he is at a national park or some great natural setting.
Does he ever really get out? I don’t know yet.
A song about a man who leaves prison after serving his time. It’s done in a 30′s swing style, and uses slang – especially prison slang – of the era. He comes home to find his girl with another man. The song is all about how he deals with the situation. I don’t know the story yet.
This post is really rudimentary from a tech standpoint. If you are even reasonably familiar with Flash you know how to fix the problem I came across.
The Rant
I was called in on a project that caught me off guard. Seriously caught me off guard. I got the call from a marketing agency whose potential clients we telling them that their site took too long to load. So I checked it out… and I waited… and waited. Thirty (3-0) seconds later, the site started up. Thirty seconds. On pretty fast cable broadband. Unbelievable. AND, worse, it was a 100% Flash site. Ugh. Ok, full disclosure: I’m a big fan of Flash. I know Steve Jobs supposedly killed Flash, or more accurately, he wishes he could kill Flash. He did get the ball rolling, but there were many reasons to hate Flash before Mr. Jobs went on a tear. From my perspective the problem is not the tool, it’s what some people choose to do with it. Anyway, that’s an entirely different topic, and one that plenty of others are going back and forth on. My point is that this site was an example of exactly what *not* to do with Flash. Just horrid. It was over 21MB of one gigantic swf. A single file that all had to load before *anything* would happen on the site. Not even a real loader of any sort.
Of course after experiencing the pain of the existing site I had to look up the person who built the site. Interestingly their own site was not 100% Flash, it looked good and worked pretty well. So why did they choose to build the agency’s site that way? You may ask why did an agency like that outsource building their own web site, but, well, it happens. Why did they ever pay for that site is certainly a realistic question to ask though.
As is usually the case, the agency had very little money for the project. I gave them the pitch any reasonable developer would – rebuild the site with minimal Flash, make it much more SEO compliant and get rid of all the bulk. Once they shot that whole idea down I got right to seeing what I could to to speed things up and keep it all looking exactly the same.
Round 1
First I took a look at all the imported bitmaps. Every one of them was set to 100% quality. Similarly, the publish settings for bitmaps was 100%. I’ve almost never seen a case where 100% was significantly better than about 80%, so I reduced the overall publish settings. Since the look of the site is sort of grunge, I went a little further and knocked the quality setting down to 70%. Then I went through each bitmap, and reduced the quality as far as I could. There were a number of very large graphic elements used as transitions – they slide past as the background changes. You barely see them. They’re large. And they were all set to 100% quality. I knocked them all down to about 15%. Then I repackaged the whole mess. With no serious changes the swf file was 8MB smaller than the original. Still way too big, but better. So I sent it to the client, told them to put it on their server and told them I’d see what else I could do.
Round 2
Without going into too much detail, I spent the next couple of days pulling out as much content as I could and splitting it into separate swf files that could be loaded into one main module. Ultimately, I could only pull out 4 out of 7 sections, but it turned out those 4 sections contained about 90% of the bulk of the site. So I left the 3 small sections in the core module, and pulled out all the over sized graphic elements to load externally as well. I used the standard method of loading external content into movie clips. Nothing at all tricky. The final result was a core module that was less than 2Mb – still way too big of course, but as small as I could get it given the time I had and the money the client had. And because of the way the site worked, the load time is now negligible. There is a loader, but the way it works makes it look like the site starts working right away. So the client was really happy.
Postscript
The result of this project feels a bit strange. On the one hand, it’s satisfying to make a big difference and make the client happy, but the original site was SO incredibly poorly designed that it’s not an ego boost or anything, I feel like I did what should have been done initially, because that’s true, and even though the client was ecstatic at the result, the site still sucks pretty badly. Ultimately it was just a frustrating situation. A tool I like being used in *exactly* the way that it’s critics like to pick on. But it wasn’t the fault of the tool. And my improvements don’t change the fact that the site should still be completely redone, not in Flash. I still like Flash for many reasons, but that’s for another time. Maybe.
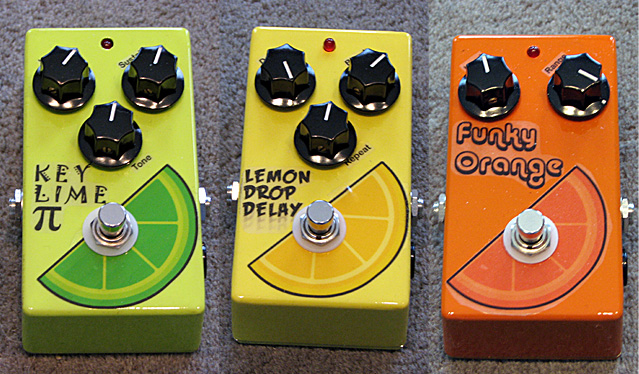
Build Your Own Clone sells great kits for buiding your own pedals. I decided to give them a shot and was adventurous, so I bought three of the kits: The Large Beaver (Big Muff clone), Envelope Filter (DOD 440) and the Digital Delay (not necessarily a clone of any particular pedal).
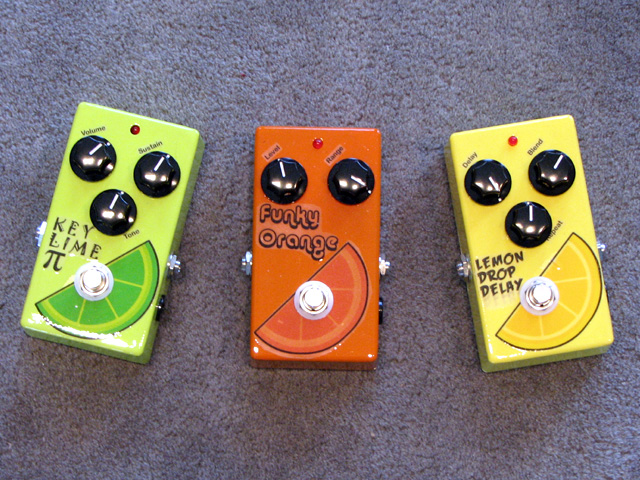
Painting: I was nervous about finishing the enclosures, but I was impatient as well. A bad combination. I went with the Beavis Box Finish in a Day method. I went to the Home Depot, picked out my favorites of the Rustoleum colors they had on hand, got primer and clear coat. Since they didn’t have self-etching primer, I got a container of etch too. They sell a quart size that was less than $5 as I recall. I followed the directions for the etch, primed and painted. I used the toaster oven trick (use an old one – never to again to be used for food!!) and baked each coat. I found that I needed to keep the parts in the oven longer than Bevis recommends. It might have been due to the cold temps on the days I did it.
Labels: To save time I went with what I had in the house. I used clear stick on labels that can be printed on with any InkJet. I created a layout in Photoshop and came up with some names. Truth is that I was trying to think up names all along, but couldn’t come up with anything clever. When the painting was done I realized the green for the Large Beaver pedal could be used to play on the “Pi” variant of the Big Muff pedals, so I came up with “Key Lime Pi”. The other two weren’t so clever, but I decide to keep them all in the citrus family. For whatever reason. Oh, right, the labels…I printed the labels and cut them out as close as I dared, then stuck them on the pedals. I put two thin clear coats the pedals and let them dry without heat. I was afraid the labels would curl right up and I’d have to start over again. I did a couple of more clear coats with heat and they were fine. I sanded and clear coated two or three times to try to minimize the edge of the labels. I think it would take about two more rounds of sanding and clear coating to get the tops to be perfectly smooth. I thought they looked pretty good as-is.
Two things to watch for with these labels: First, keep them away from the edge. It’s hard to get the clear coat smooth if the label is right on the edge. Second, keep the stickers away from any place that you’ll be putting a washer or nut. If you look closely at the Lemon Drop Delay, you’ll see that there is a little bit of a bubble. When I tighened the nut for the footswitch the clear coat cracked a little (I suspect the sticker must have compressed a tiny bit) and the next day the bubble appeared.
Oh, and you’ll notice the sticker edges show up the worst on the orange pedal. I think that’s because it’s darker and the sticker definitely lightens the color a bit. That was also the first pedal I put the stickers on, so I didn’t have the technique down yet 
Key Lime Pi – Large Beaver fuzz
This is a fairly typical fuzz pedal from what I can tell. I’m not much of a fuzz user, but there are some fun sounds in here. The tone control has a nice range. The Sustain control gives it all the long, creamy sounding buzz you need. More than I ever need at least.
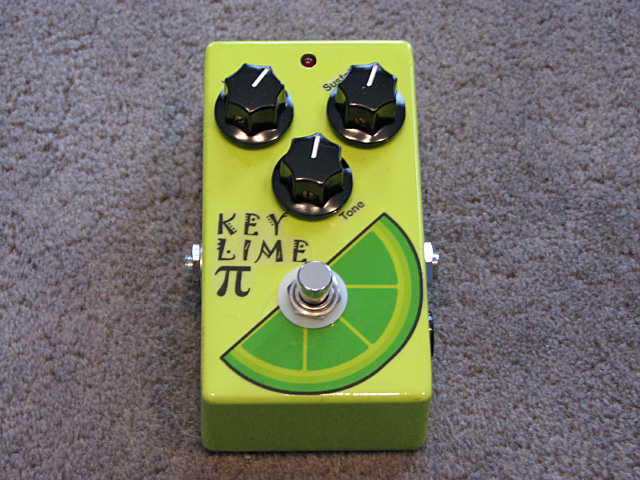
Sorry! No samples of the Key Lime Pi yet. It’s pretty typical Big Muff sound though. I had a problem with the original volume pot and had to replace it with a different one. A bit of a pain, but it worked out fine.
Lemon Drop Delay
This is a digital delay that is patterned after the older analog delay pedals. I used an Ibanez AD9 for many years and that is one of my favorties. It would be nice to have it here to compare. I think this pedal has a “digital sound” to it, but it sounds pretty good. Definitely usable, that’s for sure. I couldn’t quite get it to do the Pink Floyd “Run Like Hell” thing, but that’s probably asking a lot. Maybe I’ll try again when I’m playing better. I love the self oscillation silliness that it can get into. That was always one of my favorite things about the AD9.
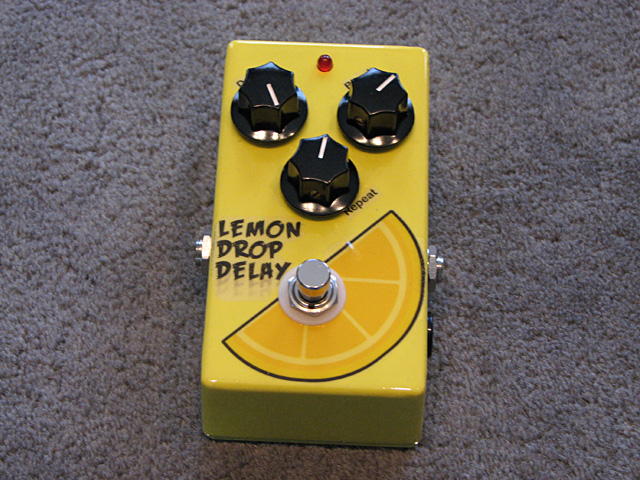
Give the Lemon Drop a listen: Lemon Drop Sample 1 – Changing Delay time
Lemon Drop Sample 2 – Slap Back
Lemon Drop Sample 3 – Harmonizing (sound on sound)
Lemon Drop Sample 4 – Self Oscillation
The Lemon Drop gave up the ghost after a few weeks of playing with it. I was 99% sure it was the delay chip that went bad (don’t ask me why I thought that). I ordered 5 more of the chips for $5 off of ebay, and so far so good.
Funky Orange – Envelope Filter
I didn’t really know what to expect with this pedal. At first I wasn’t sure it was working properly. It’s controls are pretty interactive (changing one affects the other considerably) and it’s quite sensitive to the guitar settings and the pick attack. I found on my guitar that the bridge-middle pickup combination seemed to make the filter effect more pronounced. I’m really liking this pedal right now. Fun to play with.
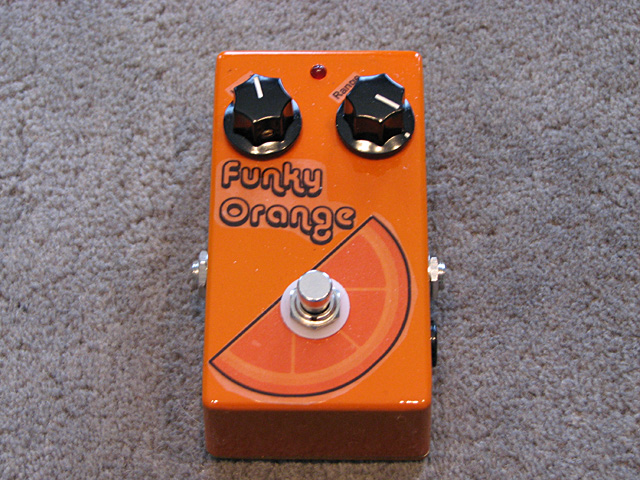
Funky Orange Sample 1 – Sly Riff, no effect then with effect
Funky Orange Sample 2 – Slow Chords
Funky Orange Sample 3 – Faster chords
Funky Orange Sample 4 – With distortion
For reference sounds (straight guitar, same guitar, same amp, no effects) see the Walnut Strat page.
Building: – The BYOC kits arrive in a plastic bag packed in a box. All the parts are there and not much else. The instructions for each pedal are on their website. Luckily, the instructions are really straight-forward. Just as backgound, I have some experience building homebrew pedals, but I’m really not all that good at it. I’ve done a couple from Craig Anderton’s book, and I’ve done a number of things like A/B switches. Simple things. Things that don’t require too much close-quarter soldering. I’ve replaced plenty of electronics on my guitars, but that’s a different sort of soldering.
I just tried to be as careful and methodical as possible. I verified that all the parts were there, laid them out, double and triple checked before I placed a component on the PCB. Checked all the solder joints before I moved on to the next. I started with what I thought would be the easiest kit (based on the density of the PCB), and saved the hardest (Digital Delay) for last. All three kits were nearly identical to put together except for the number and type of components. The boards are very clear and well laid out. A few parts on the Digital Delay made me nervous because of how close they are, but it all worked out.
I only came across a couple of little things. First, when it came time to connect the populated PCB to the hardware I had mounted in the enclosure, I wasn’t sure if I should put the wires in from the top or from the bottom. I ended up trying different ways from each pedal.
For the Envelope Filter I soldered all of the wires to the parts in the enclosure and then looped the wires from the pots over the top of the PCB. It worked fine, although there seems to be a fine balance between trying to keep the wires short and having enough to maneuver the PCB around. Here’s the inside of the Envelope Filter:
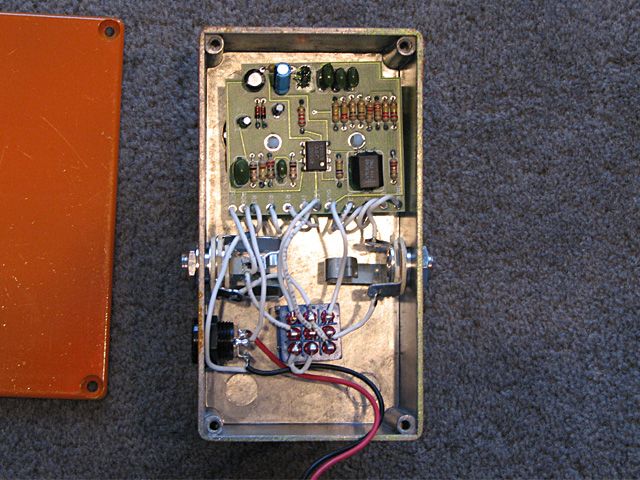
Notice how the white wires go down into the PCB.
For the Large Beaver, I did the opposite. I connected all the wires to the PCB, then connected them to the pots, switch and jacks. Although I think this might allow for shorter wires (if done properly by someone other than myself), I didn’t like this method for two reasons: First, you have to move the PCB around a lot in order to get the wires in position to solder them. I was always worried a wire or a solder joint would break. Neither happened, luckily. The second problem is that once I had everything done I had a much harder time positioning the PCB in the case. I didn’t get any of the three pedals perfect, but this one is the most off. Here’s a pic of the inside of the Envelope Filter:
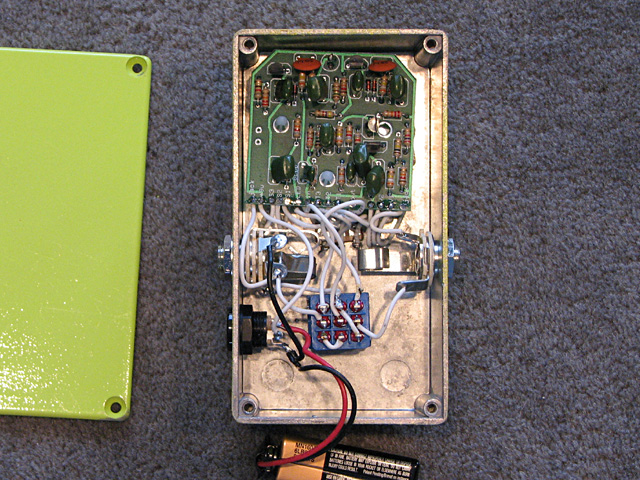
It’s a little hard to see, but the wires are inserted in the PCB from underneath.
On the Digital Delay I did a mix. I decided to install the wires from the top of the PCB, but I did a mix. I soldered the wires to the pots first, and did others however seemed comfortable. I had a little trouble with the footswitch. It’s awfully tight in there. I think I was lucky with the first two, but the third took several tries to get the wires in there relatively cleanly. Here’s the inside of the Digital Delay:
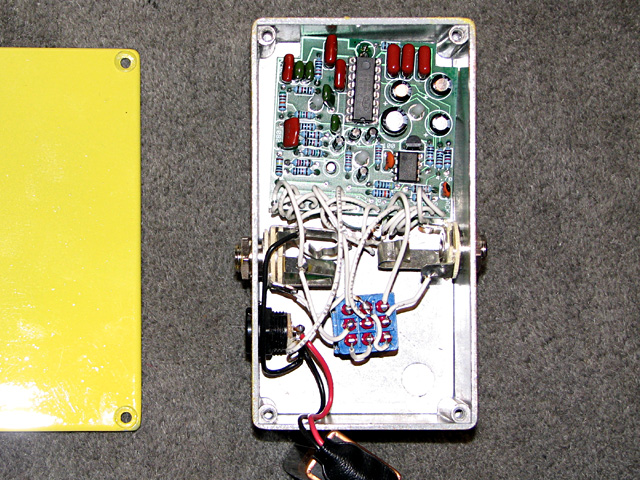
The PCB is cockeyed, but it works!
Results: All three pedals worked right after completion, but the Large Beaver had an intermittent problem with the volume control. I poked around and eventually narrowed down the problem – a bad volume pot. Once I replaced that everything was fine. The other two pedals seem to be functioning 100% – listen to the samples. All-in-all, great kits and I’m hoping I get the chance to put together a few more before too long.
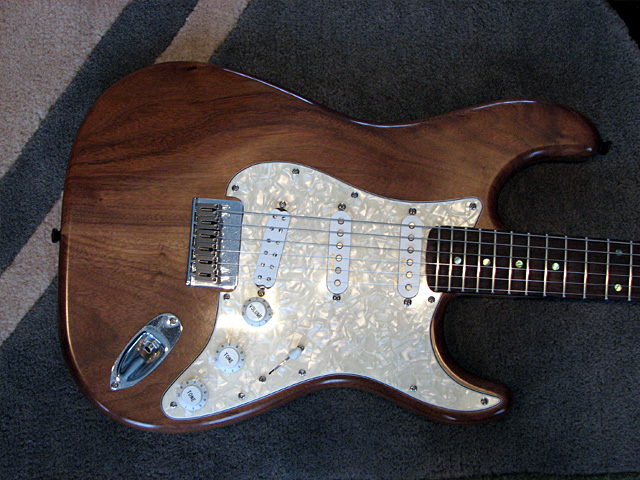
Another project guitar – my third (I sold the first). I got the body from ebay – a nice two-piece walnut body.
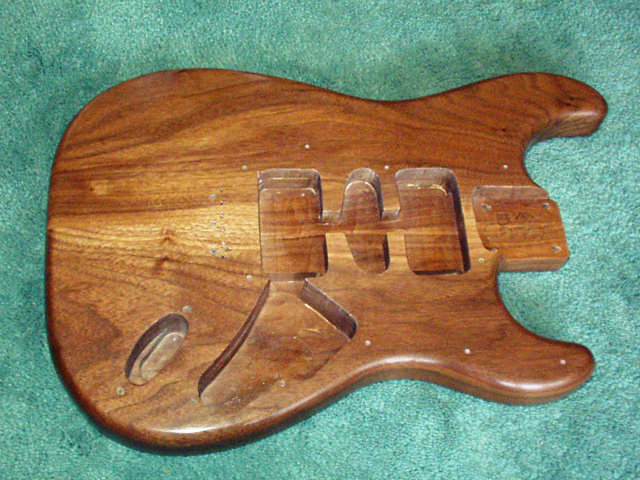
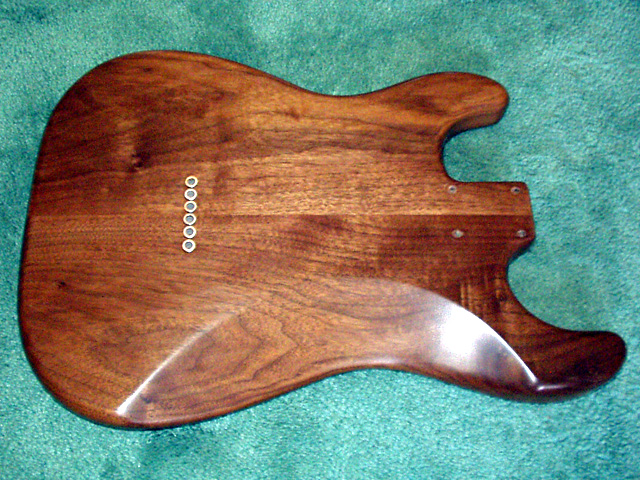
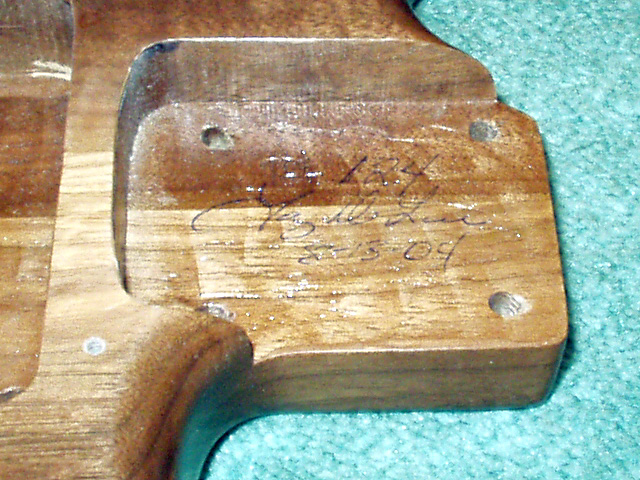
It was built by somebody “known”, but I can’t recall who. It’s signed in the neck pocket, but I can’t read it.
The first neck I used I got from someone locally. It was solid rosewood with stainless steel frets – a real beauty. I could never get used to the 1 5/8″ nut width though.
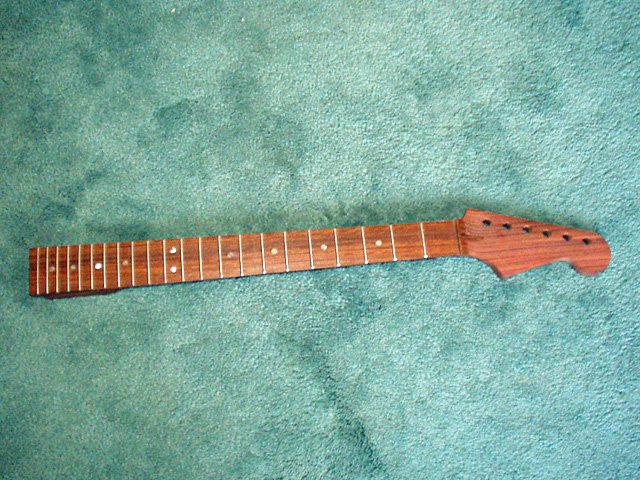
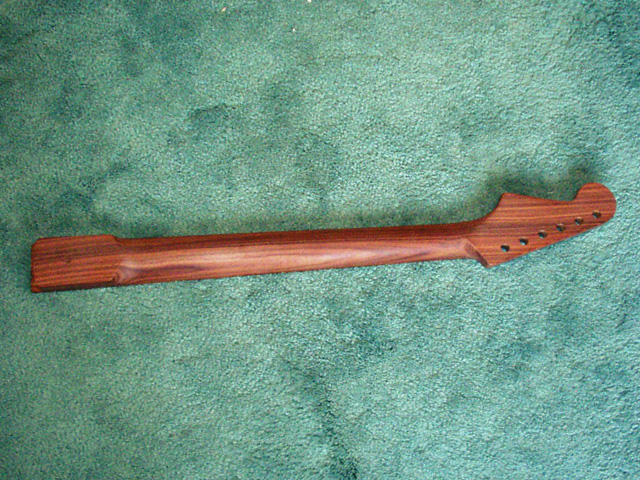
I got a used Mighty Mite neck off of ebay and that neck has made all the difference. I know it’s a lower quality neck, but it is really comfortable. I love playing that guitar now. So much so, that I took the Kinman pickups out of my Fender American Strat and put them in this guitar. I also put in a ’59 Jr. in the bridge instead of the Hot Rails. Originally I put a hot wound set of GFS pickups, which actually sounded really good.
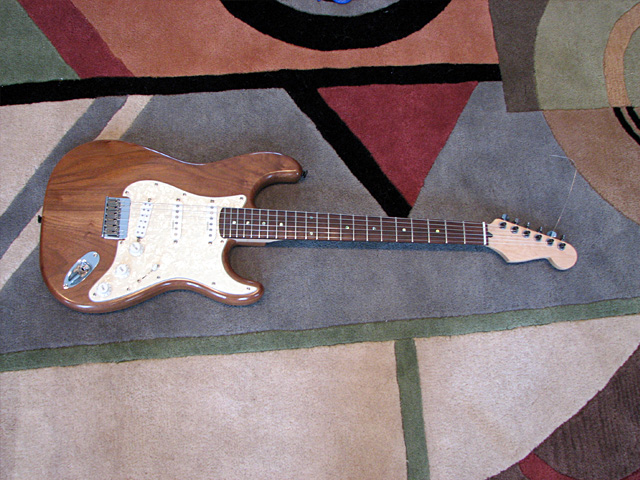
When I got the body it had a pretty thick, gloppy finish on it. I’m not sure what type. I was going to strip it off. When I began sanding it, the body started looking real nice. Not factory gloss nice, but very natural nice. I ended up sanding just enough to thin out the finish and get the drips and such out and I think it looks great. I thought putting a “relic” pickguard and controls on this guy would look good, so I tried to figure out how to do that.
I took the pickguard (a new inexpensive one), pickup covers and knobs and follow some directions I found on the internet. I soaked them in super-strong coffee for two or three days. Don’t try that. It’s a waste of time. As soon as I wiped the parts the brown patina came right off. I used a 3M pad (or is it Scotch??) to scuff the parts up a bit and tried again. Not much better. I tried tea next. Slightly better, but still not what I wanted. I tried coffee grounds directly on the parts. Nope. Finally, I got an old basin from the garage that had who knows what in it. I poured in a little Minwax wood stain and I let it sit for a day or two. The basin had dirt in it and remnants of many other projects that hadn’t been cleaned out. The parts were kind of sticky when I took them out, but the color was great. I let them dry out and then wiped them down and this time it kept looking pretty good. I used the 3M pad to put some “wear” into the parts and to my eye it looked every bit as authentic as most relics I’ve seen. Let me just say – the idea of paying extra for a fake relic is insane to me. Just my opinion.
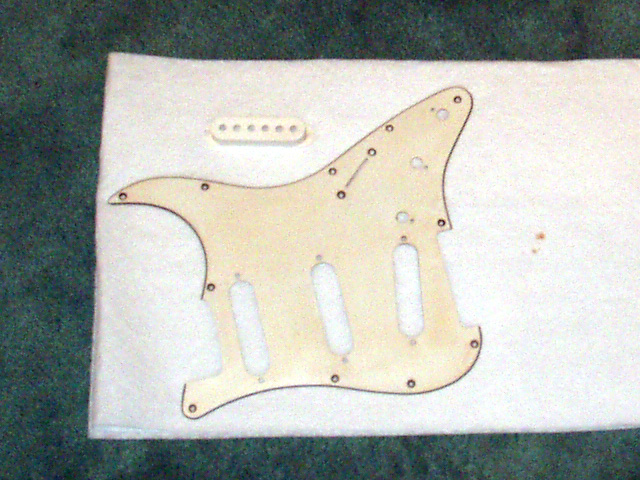
Notice the color difference between the white paper towel and the pickguard. When I started the pickguard was just as white as the paper towel.
Ultimately, I swapped out the “relic’d” parts when I swapped pickups. The main reason is that I was not about to relic a set of Kinman Pickups. They are way too expensive. I could have swapped the pickup covers, but the ’59 Jr would still have been bright white and would have looked weird. By then I also had an old MOTS pickguard that had been naturally aged by smokey bars, so I used that.
I put the same switching system in that I had in my American Strat – a Mega Switch from Stew-Mac wired so the middle position is neck-bridge instead of the usual middle pickup only. I love the neck-bridge combination, and most strats don’t have it. The Mega switch lets you do that without changing how the guitar works or looks – no extra switches and no push-pull pots, which I’ve never been too keen on. Here are some sound samples:
Walnut Guitar – Neck Pickup (Kinman AVn Blues)
Walnut Guitar – Neck & Middle Pickup (Both Kinman AVn Blues)
Walnut Guitar – Neck & Bridge (Kinman AVn Blues and Seymour Duncan ’59 Jr.)
Walnut Guitar – Middle & Bridge Pickup (Kinman AVn Blues and Seymour Duncan ’59 Jr.)
Walnut Guitar – Bridge Pickup (Seymour Duncan ’59 Jr.)
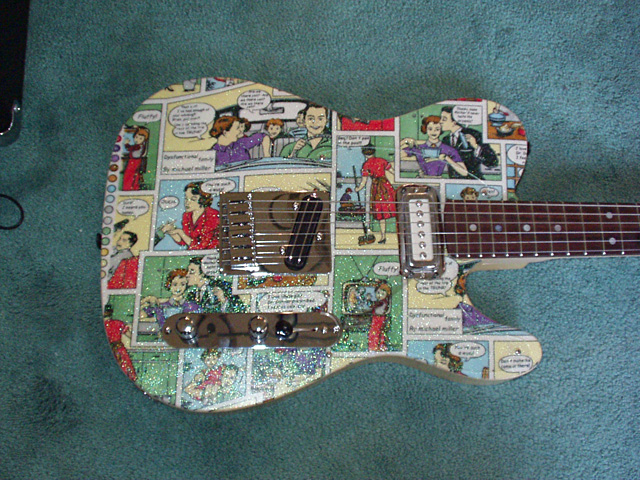
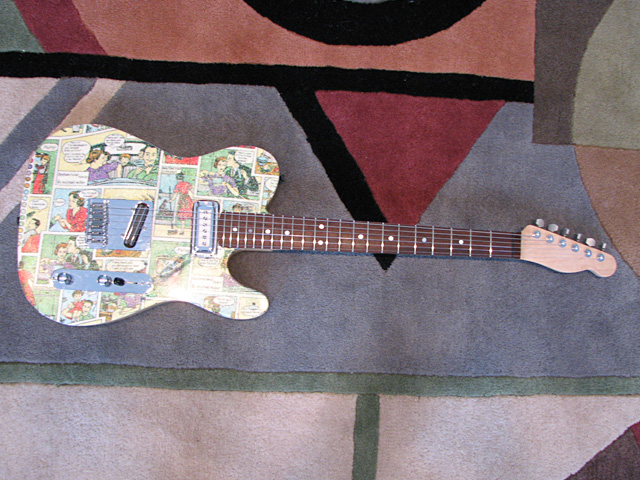
The Dysfunctional Tele was my second home built project guitar. I bought the body and neck from a guy in Texas who builds his own parts. The neck is wider than normal – about 1 3/4″ at the nut. That makes it really nice for fingerstyle things. The body is real nice two-piece ash, and the neck is maple with a rosewood fingerboard.
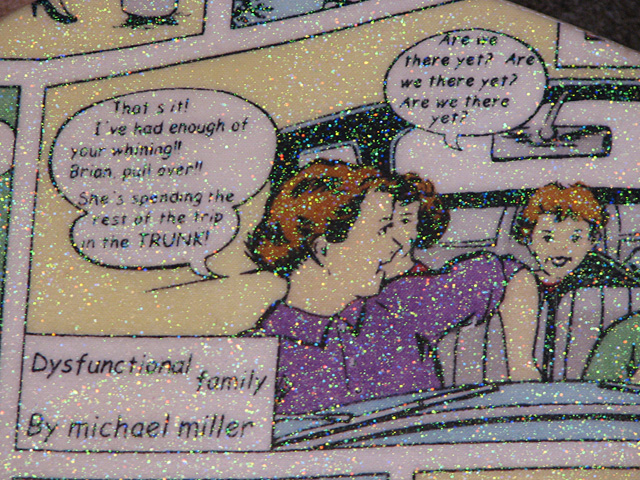
I decided to do something kind of wacky with the finish. I used a piece of material that has a “Dysfunctional Family” comic pattern designed by Michael Miller. Here’s how I finished the body:
- After sanding and sealing the body I finished it in white primer
- I used a Pearl finish spray from Michael’s Art store. That gave the body a slight sheen, and it turned the color into a cream sort of color
- I washed the material, ironed it and then used 3M Adhesive Spray to attach the material to the top of the body
- Once it was completely dry I trimmed around the edge of the body with an exacto knife
- I sprayed the entire body with a glitter spray, also from Michael’s
- I sealed the body with several coats of Minwax Water-based Polyurethane, with the usual sanding in between
The pickups are from GFS and sound pretty good. Here are some pics:
